Are you feeling overwhelmed by setting up moving head lights? The complex rigging and programming can be intimidating. This guide breaks down every step into simple, manageable actions.
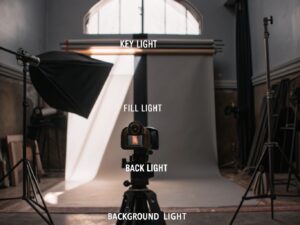
To install and program moving head lights, you must first plan your layout, then safely rig the fixtures with clamps and safety cables[^1]. After connecting power and DMX cables[^2], you set a unique DMX address on each light and use a controller to program your desired scenes and effects.
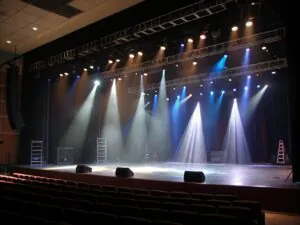
[^3]](https://monalight.com/wp-content/uploads/2025/07/1-.jpg "Moving Head Light Installation Guide")
Getting your hands on professional gear is only the first step. To truly create magic, you need to understand how these lights work from the inside out and how to set them up for a flawless show. I've spent nearly two decades in this business, and I can tell you that a successful lighting design[^4] is 90% preparation. Before we plug in a single cable, let's start with the fundamentals. This foundation is what separates a good technician from a great one, so let's dive in.
What are the basics of moving head lights?
New to automated lighting? The different types and parts can seem confusing. Let’s make it simple by breaking down exactly what these powerful tools are and why they are essential.
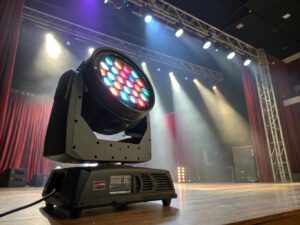
A moving head light is a versatile, automated fixture that you control remotely. Its head can pan (move horizontally) and tilt (move vertically). You can also change its color, patterns (gobos), and beam focus, all from a DMX controller, making it indispensable for creating dynamic stage effects.

In my early days as a technician, I learned that understanding your tools is non-negotiable. A moving head isn't just one light; it's a collection of precise components working together. Let's look at what makes them tick.
Anatomy: Key Components Explained
Every moving head has a similar structure. The base is the stationary foundation that houses the power supply and DMX connections. The yoke (or arm) connects the base to the head and allows for the tilt movement. The head contains the lamp, optics, color wheels, and gobo wheels, and it performs the pan movement. Finally, the lens at the front focuses the light beam.
| Component | Function |
|---|---|
| Base | Houses electronics, power/DMX ports. Stays fixed. |
| Yoke | The "arm" that allows the head to tilt up and down. |
| Head | Contains the light source, optics, colors, gobos. |
| Lens | Focuses the light beam emerging from the head. |
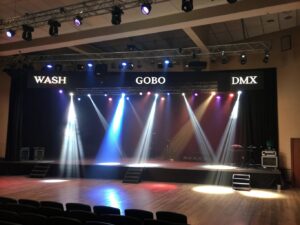
Core Types: Spot, Wash, Beam, and Hybrids
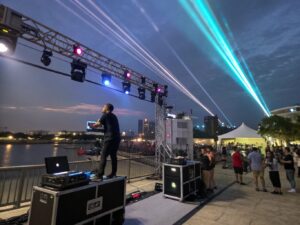
Not all moving heads are the same. The main types are Spot, Wash, and Beam. A Spot projects a hard-edged beam and is used for projecting patterns (gobos) and creating defined circles of light. A Wash creates a soft-edged field of light, ideal for covering large areas like a stage or backdrop in color. A Beam produces a very narrow, intense, and sharp pencil-like beam, perfect for dramatic mid-air effects. Hybrid fixtures combine two or three of these functions into one unit, offering great versatility.
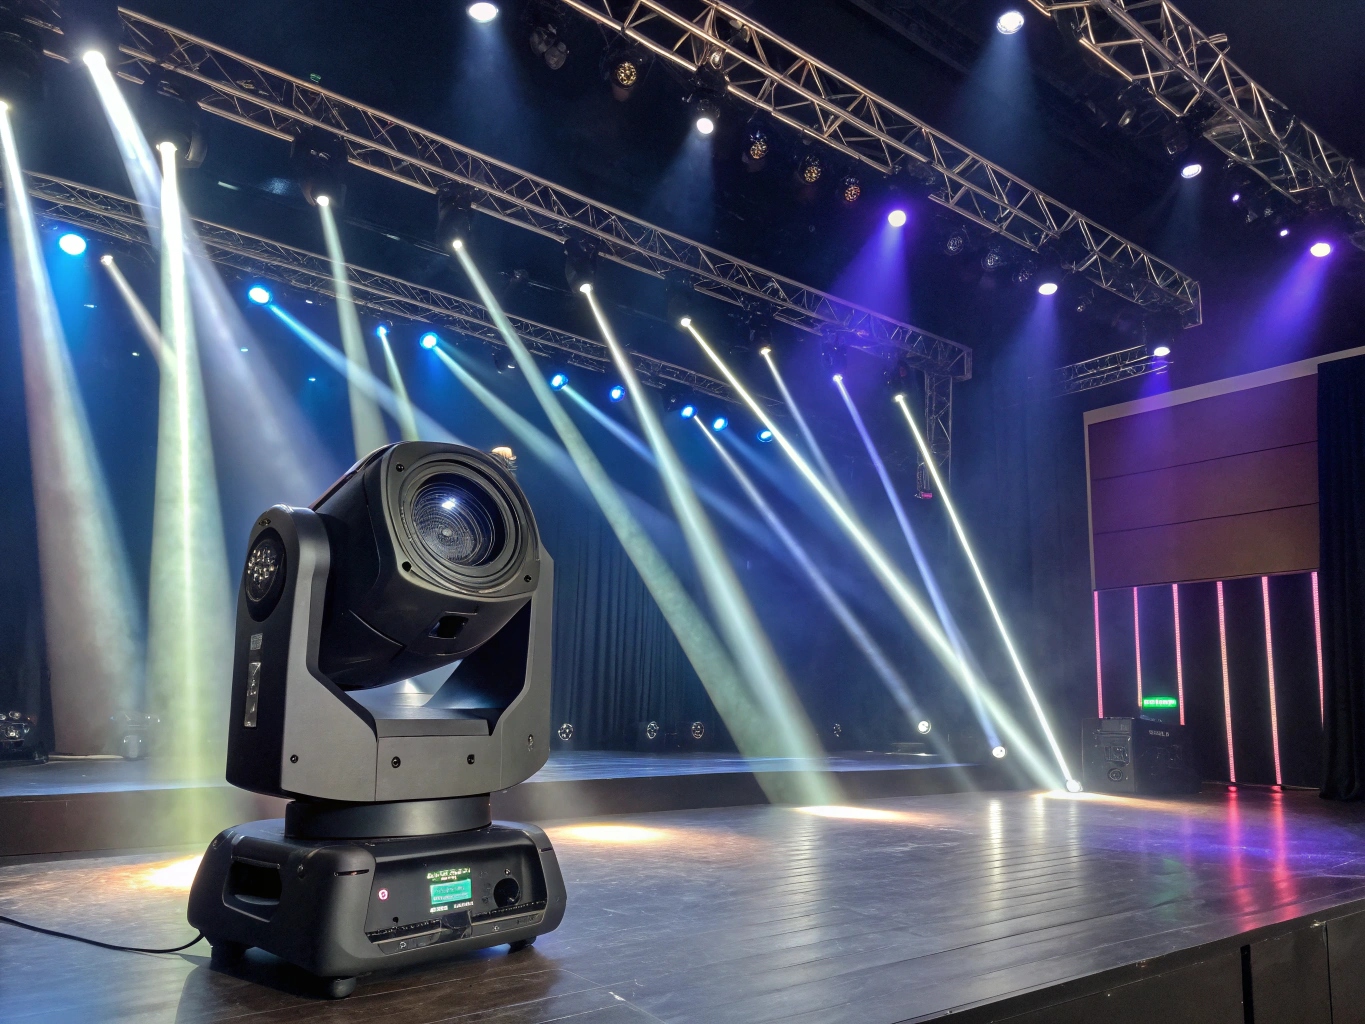
Why Use Moving Heads?
Their core advantage is dynamism. Instead of needing dozens of static lights, a few moving heads can do the work of many. They can spotlight a singer, wash the stage in color, and create exciting aerial effects, all within the same show. For any application—from a large concert to a wedding DJ setup—they bring the stage to life, direct the audience's attention, and build an unforgettable atmosphere. This flexibility is why they are a cornerstone of modern lighting design.
How do you plan before installation?
Ever tried to build something without a plan? It often leads to mistakes and frustration. Rushing into a lighting setup is no different. A good plan is your most important tool.
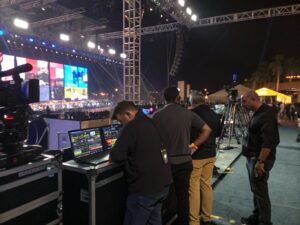
A professional lighting plan starts with defining your goals (atmosphere, focus, effects). Next, you create a basic light plot to map where each fixture will go. Finally, you prepare a complete checklist of all the equipment and tools you will need for the job.
[^5] on a piece of paper](https://monalight.com/wp-content/uploads/2025/07/5.jpg "Stage Light Plot Planning")
I've seen too many shows get delayed because of poor planning. A missing cable, a forgotten clamp, or not enough power can bring your entire setup to a halt. Taking an hour to plan can save you five hours of trouble on-site. This is a non-negotiable step for my team at Monalight, and it should be for you too.
Step 1: Define Your Lighting Goals
First, ask yourself: what do I want the lights to do?
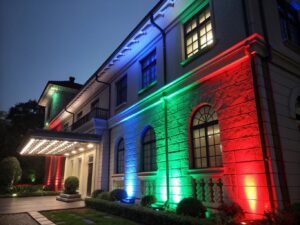
- Atmosphere: Are you trying to create a mood? For example, deep blues and purples for a dramatic scene or warm ambers for an intimate acoustic set.
- Focus: Do you need to highlight specific people or objects? This is where you would use spotlights to follow performers.
- Effects: Are you looking for high-energy, eye-catching visuals? This means using fast movements, strobing, and mid-air beam effects for a concert or dance floor.
Step 2: Create a Basic Light Plot
You don't need fancy software. A simple hand-drawn sketch of the stage or venue is enough. Mark where the stage, speakers, and audience are. Then, decide where to place your lights. Think about how you will hang them—on a truss, on stands, or on the floor. Mark the positions of your fixtures on the diagram. Most importantly, think about your cable runs. Where will you run power and DMX cables to reach every light without creating a tripping hazard?
Step 3: Complete Equipment and Tool Checklist
Now, make a list of everything you'll need to bring. This prevents you from forgetting a crucial item.
| Category | Items |
|---|---|
| Lights | Moving head fixtures (Spots, Washes, etc.) |
| Rigging | Truss sections, lighting stands, C-clamps or O-clamps, safety cables |
| Cabling | DMX cables (various lengths), power extension cords |
| Control | DMX controller (hardware console or software), DMX terminator |
| Tools | Adjustable wrench, gloves, gaffer tape, zip ties |
How do you physically install the lights?
Hanging heavy lighting equipment high in the air can be dangerous. The fear of a fixture falling or power failing is real. By following a safety-first process, you can ensure a secure and reliable installation.
To physically install the lights, first, securely mount each fixture to a truss or stand using the correct clamp and always attach a safety cable. Next, manage power distribution[^6] to avoid overloading circuits. Finally, "daisy-chain" the lights together using DMX cables for control.

Safety is the most important part of our job. I will never forget a time early in my career when I saw a fixture fall from a rig because the technician forgot the safety cable. Nobody was hurt, but it was a powerful lesson. Never cut corners on safety. Always double-check your rigging.
Step 4: Safely Mount and Hang Fixtures
The most common way to hang moving heads is on a metal truss. Use a proper lighting clamp (like an O-clamp that wraps fully around the truss pipe) to attach the fixture. Tighten the clamp securely with a wrench. The single most important step is to then attach a safety cable. This is a steel wire that wraps around both the truss and the fixture’s safety loop. If the primary clamp were to fail, the safety cable will prevent the light from falling. If you're not using a truss, you can use heavy-duty lighting stands[^7].
Step 5: Power Distribution and Management
Moving heads can draw a lot of power. Never plug too many lights into a single standard wall outlet. You risk overloading the circuit and tripping a breaker, which could kill your entire show. The best practice is to calculate the total amperage of your lights and use a dedicated power distributor. This pulls power from a high-capacity source and splits it into multiple protected circuits. At the very least, spread your lights across several different wall circuits in the venue to balance the load.
Step 6: DMX Connection: How to Daisy-Chain
DMX is the signal that tells your lights what to do. Each moving head has a DMX IN and a DMX OUT port. To connect them, you run a DMX cable from your controller's output to the DMX IN of the first light. Then, you run another cable from the DMX OUT of the first light to the DMX IN of the second light. Continue this "daisy-chain" for all your fixtures. It's crucial to put a DMX terminator in the DMX OUT port of the last light in the chain. This small plug prevents signal reflection and errors that can cause your lights to flicker or behave erratically.
How do you activate your lights with DMX?
You've hung your lights and connected the cables, but they aren't doing anything. This is where technicians get stuck, confused by DMX addresses, channels, and modes. Let's make this simple.
Activating your lights involves understanding DMX addresses and channels. You must set a unique starting DMX address on each fixture. Then, you connect a DMX controller, which uses these addresses to send specific commands (like color or movement) to each individual light.

Think of DMX like a set of mailboxes on a street. Each house (your moving head) needs a unique address. The DMX controller[^8] is the mail carrier, delivering specific letters (commands) to each house. If two houses have the same address, they'll get the same mail and do the same thing, which is sometimes what you want, but usually, it just causes confusion.
Understanding DMX Addresses, Channels, and Modes
- DMX Address: This is the unique starting number you assign to each light. The first light might be address 1, the second could be 17, the third 33, and so on.
- Channels: Each function of a light (pan, tilt, color, gobo, etc.) is controlled by a DMX channel. A typical moving head might use 16 channels. So, if you set the first light to address 1, it will use channels 1 through 16.
- Mode: Most fixtures have different "modes" (e.g., a basic 8-channel mode or an advanced 16-channel mode). You must ensure that the mode set on your fixture matches the mode you select in your DMX controller software or console.
Step 7: Set the DMX Address on Each Fixture
Using the small LCD screen and buttons on the base of each moving head, navigate to the DMX address setting. For the first light, set it to 1. If your light uses 16 channels, the next available address is 17 (1 + 16). So, set your second light to address 17. The third would be 33 (17 + 16), and so on. Spacing them out like this ensures they don't overlap.
Step 8: Connect and Configure Your DMX Controller
Connect your DMX controller to the first light in your chain. Whether you're using a physical console or software on a laptop, you'll need to "patch" your fixtures. This means telling the controller what type of light is at what address. For example, you tell it, "There is a Monalight Spot 350 at address 1, and another one at address 17."
Step 9: Basic Programming: Create Your First Scene and Chase
Once patched, you can start programming. A scene (or a "cue") is a static look. For example, you could program a scene where all lights are pointed at the center stage and colored blue. A chase is a sequence of scenes. You could create a simple chase where the lights change from red to blue to white, one after another. Start simple by programming a few color presets and positions. This is the foundation of any great light show.
What about testing and troubleshooting?
The show is about to start, and a light starts flickering or won't respond. This is every technician's nightmare. A pre-show check[^9] and knowing how to troubleshoot are essential skills.
For a perfect show, run a pre-show test to check that every light powers on and responds to DMX. If you encounter issues like flickering or no response, the most common culprits are a bad DMX cable, an incorrect address, or a missing terminator plug.

There's no feeling worse than discovering a problem mid-show when it's too late to fix it. I make it a rule to run a full system check before every single event, no matter how small. It's about professionalism and peace of mind. A simple checklist can save you from a huge headache later.
Pre-Show Test: The Checklist for a Perfect Run
Before the doors open, go through every light one by one from your controller.
| Check | Action |
|---|---|
| Power On | Ensure every fixture has power and completes its boot-up sequence. |
| DMX Response | Select each light individually and confirm it responds. |
| Pan & Tilt | Move the light to its full extent left, right, up, and down. |
| Color Cycling | Cycle through all basic colors (Red, Green, Blue, White, Amber). |
| Gobo and Focus | If it's a Spot, cycle through all gobos and check the focus. |
| Reset | Send a reset command to ensure the fixture calibrates correctly. |
Common Installation Problems and Their Solutions
Even with careful planning, problems happen. Here’s how to solve the most common ones quickly.
| Problem | Common Causes | Solution |
|---|---|---|
| Lights are Flickering | Bad DMX cable; Missing DMX terminator; DMX cable is too long (>100m). | Swap the DMX cable with a known good one. Add a terminator to the last light. If the cable run is long, use a DMX splitter/booster. |
| A Light is Not Responding | Incorrect DMX address; Bad cable; Fixture in the wrong mode (e.g., sound-active). | Double-check the address on the fixture. Check the cable connections. Go into the fixture’s menu and ensure it's set to DMX mode. |
| Colors are Incorrect | The fixture profile in your controller doesn't match the fixture's channel mode. | Check the fixture's manual to see how many DMX channels it uses in its current mode. Make sure your controller is patched with the correct profile. |
Do you have more questions?
You've learned the whole process, but specific questions might still pop up. Finding clear answers for your unique situation can be tough. Here are my answers to the most common questions I get.
The number of lights you need depends on your venue size and goals. You can control lights without a full DMX console using built-in modes. For reliability, always prefer 5-pin DMX cables.

After 19 years, I've heard every question imaginable. These are the ones that come up time and time again, from beginners and experienced pros alike. Getting these details right will elevate the quality and reliability of your work.
How many moving head lights do I need?
This is the classic "it depends" question. For a small DJ setup in a bar, 2 to 4 moving heads can be very effective. For a band on a medium-sized stage, you might want 6 to 10 fixtures to create washes, spots, and backlighting. For a large concert or festival stage, you could be dealing with 50, 100, or even more. Start with your goal: do you want to cover the whole stage in color, or just create a few focused specials? Your budget and the venue's power capacity will also be major factors.
Can I control moving heads without a DMX console?
Yes, most modern moving heads have built-in standalone modes.
- Auto Mode: The light will cycle through pre-programmed movements and color changes on its own.
- Sound-Active Mode: A built-in microphone listens to the music, and the light changes in time with the beat.
These modes are great for simple setups where you just need some background movement, but they offer no creative control. For any professional show, a DMX controller is essential.
What's the difference between 3-pin and 5-pin DMX cables?
The official DMX-512 standard specifies a 5-pin connector. Pins 1, 2, and 3 are for ground, data -, and data +. Pins 4 and 5 are reserved for a second data link, but are almost never used. Many manufacturers use 3-pin plugs because they are cheaper and look identical to microphone XLR cables (Warning: do NOT use mic cables for DMX!). While 3-pin often works for short runs, 5-pin cables offer better shielding and are the professional standard for ensuring a reliable signal with no interference. I always recommend using 5-pin DMX cables.
How should I maintain my moving head lights?
Proper care extends the life of your investment. The two most important tasks are cleaning the lenses and the cooling fans. Dust on the lens will make the output dim and blurry. Dust clogging the fans will cause the light to overheat, which can damage the lamp and electronics. Periodically use compressed air to blow out the vents and a soft, lint-free cloth to clean the exterior lens. Also, regularly check that the pan and tilt movement is smooth.
Conclusion
Installing and programming moving heads is a skill. It may seem complex, but with a solid plan and a step-by-step approach, you can create stunning and reliable shows.
[1]: Understand the critical role of safety cables in preventing accidents during lighting installations.
[2]: Learn about DMX cables to ensure proper communication between your lighting fixtures and controller.
[3]: Discover the role of trusses in lighting setups to ensure safe and effective rigging.
[4]: Discover essential principles of lighting design to enhance your stage setups and create captivating atmospheres.
[5]: Find out how to create an effective lighting plot to streamline your setup process and avoid mistakes.
[6]: Explore power distribution methods to ensure safe and efficient power management for your lighting fixtures.
[7]: Learn about various lighting stands to choose the best options for your specific event needs.
[8]: Learn about DMX controllers to effectively manage and program your lighting fixtures for shows.
[9]: Learn the importance of a pre-show check to ensure everything is functioning properly before your event.

You may also be interested in: