What's the Professional Way to Light a Stage with LEDs?
You’ve invested in modern LED stage lights, but the result looks amateurish. Your stage feels flat, performers get lost in the shadows, and the show lacks the emotional impact you envisioned.
The professional way to light a stage is to build in layers. First, apply the three-point lighting rule for clear visibility. Then, select the right combination of light types (profiles, PARs, moving heads). Finally, use them together to create a cohesive scene with atmosphere and focus.

In my 19 years in this industry, I've seen it all. I've seen huge budgets wasted on shows that looked terrible because the team didn't respect the fundamentals. My philosophy of "quality is life, innovation is soul" isn't just about building reliable hardware. It's about knowing how to use that hardware to create art. True innovation comes from mastering the basics first. Only then can you use your tools creatively and effectively to light up every stage dream.
What is the basic rule for lighting a stage?
You put a spotlight on your main speaker, but they still look flat and lifeless. Without the right technique, even the brightest light can fail to shape your subject or separate them from the background.
The most basic and essential rule is Three-Point Lighting1. This classic technique uses a Key light, a Fill light, and a Backlight to give your subject depth, dimension, and a professional, polished look.

Learning three-point lighting as a young technician was a complete game-changer for me. It’s the foundation for making anyone look good. The goal is to control light and shadow to create a three-dimensional image. You are not just blasting your subject with light; you are sculpting them. Each of the three lights has a specific job. A skilled technician like Nick in Argentina uses this rule every single day, whether he's lighting a CEO for a corporate event or the lead singer of a rock band. It is the single most important technique to learn to elevate your lighting from basic illumination to professional design.
The Three Lights and Their Jobs
| Light Position | Its Purpose | The Result |
|---|---|---|
| Key Light | The main, brightest light source, angled to one side. | It defines the subject's shape and provides the primary illumination. |
| Fill Light | A softer light source on the opposite side of the key. | It softens the harsh shadows created by the key light, revealing more detail. |
| Back Light | A light placed behind the subject, often from above. | It creates a subtle glowing edge (a "rim light") that separates the subject from the background. |
What are the best lights for staging?
You know you need lights, but the list of options is overwhelming. Choosing incorrectly can be a frustrating and costly mistake that leaves you without the right tool for the job.
There is no single "best" light. The best lighting comes from using a balanced team of lights. You need Key lights for focus, Wash lights for atmosphere, and Effect lights2 for energy, all working together.

Think of it like a toolkit. You wouldn't try to build a house with only a hammer. The same is true for lighting design3. You need a mix of specialized tools to do the job right. The most common mistake I see beginners make is buying only one type of light, like wash lights, and then wondering why their lead performer doesn't stand out. Professional staging is about creating a complete visual picture. This requires different types of light to handle the different parts of that picture. Our goal at Monalight is to build powerful, reliable tools for each role, from key lights to effects.
Your Essential Stage Lighting Toolkit
| Light Category | Primary Job | Go-To LED Fixture |
|---|---|---|
| Key Light | Make the subject clearly visible. | LED Profile (Ellipsoidal) |
| Wash Light | Cover the stage in a field of color. | LED PAR Can or Fresnel |
| Effect Light | Add movement, texture, and excitement. | LED Moving Head or Strobe |
What are the different types of LED stage lights?
You know you need a "wash" light and a "spot" light, but what's the real difference between a PAR, a Fresnel, and a Profile? The specific jargon can be confusing if you're new to lighting.
The main types of LED stage lights are defined by the kind of beam they produce. These include PARs for intense washes, Profiles for sharp-edged spots, Fresnels for soft-edged washes, and Moving Heads for ultimate versatility.

Understanding these core fixture types is key to making smart choices for your lighting rig4. Each one is designed to do a specific job exceptionally well. While a versatile fixture like a moving head can mimic some of these roles, having dedicated lights for foundational tasks is often more efficient and effective. This is part of the "quality is life" ethos—choosing the right, high-quality tool for the right task every time. It ensures you have stable, reliable light where you need it most, which is a major concern for experienced technicians who need to prevent equipment failures.
The Most Common LED Fixture Types
| Fixture Type | What Makes It Special? | Best Used For |
|---|---|---|
| LED PAR Can | A simple, powerful, punchy beam of light. The workhorse. | Color washes, uplighting, general stage lighting. |
| LED Profile | A sharp-edged beam with shutters to shape the light and a slot for gobos (patterns). | Key lighting a subject, projecting logos and textures. |
| LED Fresnel | A soft-edged beam that blends easily with other lights. | Creating very smooth, even fields of light, like for a theater stage. |
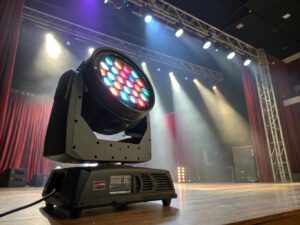
| LED Moving Head | A robotic light that can move, change color, focus, and project patterns. | Creating dynamic "wow" moments, lighting moving targets. |
What is the best way to light a stage?
You know the rules and you have the lights, but what's the process? Just putting lights up randomly will create a visual mess. A systematic approach is needed to build a professional-looking scene.
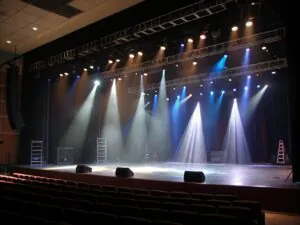
The best way to light a stage is to build your look in three layers. Start with a base layer of atmospheric wash light, then add a key light layer for your subject, and finish with a layer of effects and accents.

I like to think of this process as painting a picture. You don't start with the tiny details; you start with broad strokes and then add definition and highlights. Lighting works the same way. This layered approach ensures that all your bases are covered. Your stage has a mood, your audience can see what's important, and you have dynamic elements to keep it interesting. This methodical process helps you create a cohesive, professional look every time, instead of just a random collection of lights. It turns your equipment into a powerful storytelling tool.
Here's the step-by-step method:
- Layer 1: The Canvas (Wash Light): Use LED PARs or Fresnels to cover your stage in a base color. This sets the overall mood and atmosphere of the scene.
- Layer 2: The Subject (Key Light): Use LED Profile5s to apply the three-point lighting rule to your performers or speakers. This makes them pop and ensures they are the center of attention.
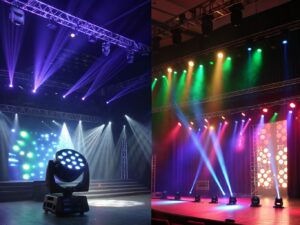
- Layer 3: The Details (Effects): Use Moving Heads, strobes, or other accent lights to add movement, texture, and visual excitement. This is the final layer that brings the scene to life.
Conclusion
The best way to light a stage is to follow a proven method. By using the three-point rule, a balanced toolkit of lights, and a layered approach, you can create a professional look every time.
-
Explore this resource to understand the foundational lighting technique that transforms flat visuals into dynamic, professional scenes. ↩
-
Learn how Effect lights add excitement and movement, enhancing the overall visual experience of your show. ↩
-
Delve into the principles of lighting design to elevate your stage setups from basic to professional. ↩
-
Get insights on selecting the best lighting rig to meet your production needs and enhance your performance. ↩
-
Discover the versatility of LED Profile lights for key lighting and projecting patterns, a must-have in any lighting toolkit. ↩
You may also be interested in:

